In films and television dramas, the microphone recording the actors is usually just above their heads, out of sight, on a long pole called a boom. Boom microphones give dialogue a natural, open sound that matches what the camera sees, and they record everyone in a scene without anyone wearing a microphone. Using one well is a real skill: the microphone must stay close, point the right way, follow the speaker and never dip into the frame. This lesson explains shotgun and boom microphones, the equipment around them, where to place them and how boom operators work.
What a boom microphone is
A boom microphone is a directional microphone, usually a shotgun or supercardioid, mounted on a long pole and held close to the speakers just outside the frame. Pickup patterns were explained in microphone types and pickup patterns. Because it is near the mouth and aimed at it, the voice is strong and natural, and it captures the space in a way that matches the picture.
The boom kit
| Part | Purpose |
|---|---|
| Shotgun or supercardioid microphone | Hears mainly in front, reducing side noise |
| Boom pole | A light, extendable pole, often 2 to 4 meters long |
| Shock mount | Holds the microphone on elastic so handling noise does not reach it |
| Foam windscreen | Reduces breath and light air movement indoors |
| Windshield (blimp) and furry cover | Protects against wind outdoors |
| Cable or wireless link | Sends the signal to the recorder or camera |
| Headphones | So the operator hears exactly what is recorded |
Tip:Shotgun microphones suit outdoors and larger spaces. In small rooms with hard walls, they can sound hollow because of reflections, so many sound recordists use a supercardioid indoors.
Where to put the boom
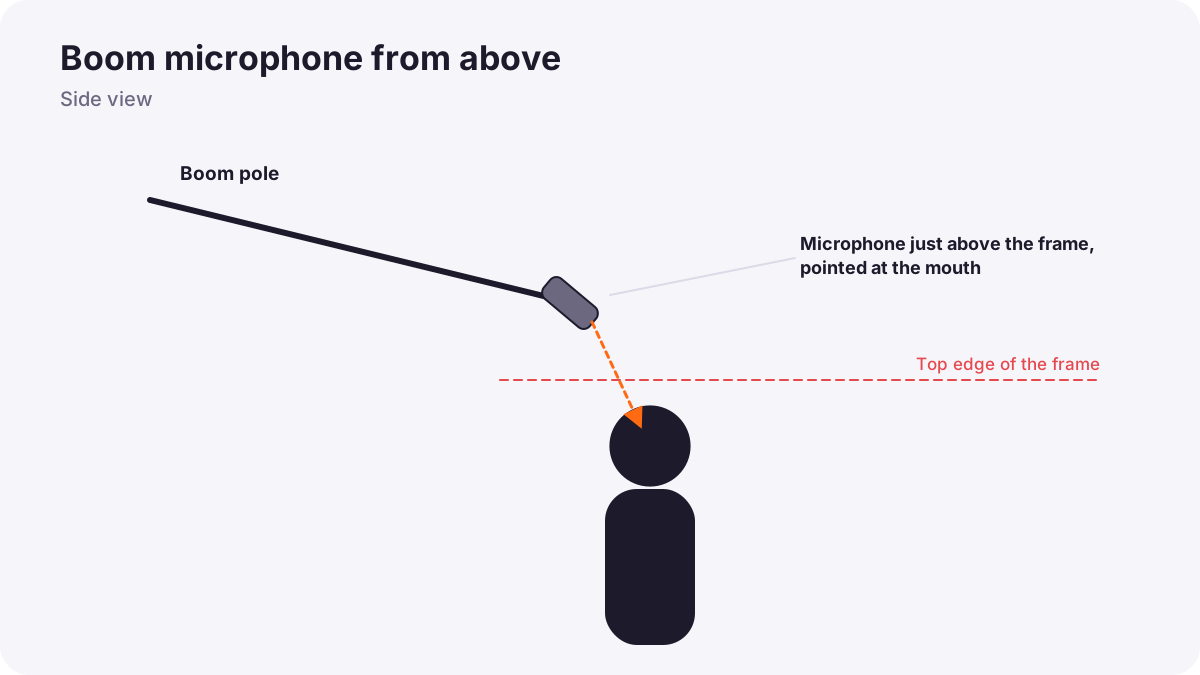
- From above (overhead): the most common position. The microphone points down toward the speaker's mouth or upper chest, just above the top edge of the frame.
- From below (underneath): pointing up from below the frame for tight shots or low ceilings; it can pick up more chest and footstep noise.
- Close as possible: usually less than a meter from the mouth, as near as the frame allows, as in how sound works.
- Pointed at the mouth: even a small angle away from the mouth makes the voice thinner.
- Aimed away from noise: point the back of the microphone toward traffic or machines where possible.
The frame line
The boom must stay just outside the picture. Before each take, the boom operator asks the camera operator for the frame line, then lowers the microphone into the shot and raises it until it just disappears. Wider shots allow the boom to be closer for close-ups and farther for wide shots, which is why wide shots often have weaker sound. Watch also for the boom's shadow on walls and faces, especially with hard light.
Boom technique
- Learn the script and blocking so you know who speaks when and where they move.
- Hold the pole above your head with arms close to the body; holding it near the end gives better control.
- Follow the speaker smoothly, turning the microphone to each person just before they speak.
- Handle the cable quietly, wrapped around the pole without slapping.
- Listen all the time on headphones and tell the director about noise problems.
Remember:Booming is tiring. Long takes need rest, rehearsal and, on longer productions, a stand to hold the boom between takes.
Boom and lav together
Many productions record both a boom microphone and lavalier microphones on separate tracks. The boom usually sounds more natural; the lav is a backup and can be closer when the boom cannot reach. The editor or mixer chooses or blends the best. Lavs were explained in lavalier and wireless microphones.
Common mistakes
- Boom too far away: the voice sounds distant and roomy.
- Microphone in the shot: the take is ruined.
- Boom shadow on faces or walls: visible in the picture.
- No shock mount: handling noise and bumps are recorded.
- Not following the speaker: lines are recorded off-axis and thin.
- Shotgun in a small hard room: hollow, echoey sound.
How boom operators work
Boom operators study the script, rehearse with the actors and camera, find the frame line for every shot, work with the lighting team to avoid shadows, and follow every line precisely. They record alongside lav microphones, protect against wind outdoors, and keep the microphone as close as the frame allows.
Practical examples
A two-person dialogue scene
- Situation
- Two actors talk across a table in a medium shot.
- What to do
- You boom from above, turning the microphone between them just before each line.
- Why it works
- A close, well-aimed boom records both voices naturally.
- Result
- Clean, matching dialogue for both actors.
A windy hillside
- Situation
- Wind roars through your shotgun microphone outdoors.
- What to do
- You add a windshield with a furry cover and turn on the low-cut filter.
- Why it works
- Wind protection and low-cut filtering reduce wind noise.
- Result
- Usable dialogue despite the breeze.
Key points
- A boom microphone is a directional microphone on a pole, held close but just outside the frame.
- The kit includes a shotgun or supercardioid, pole, shock mount, wind protection and headphones.
- Boom from above, as close as possible, pointed at the mouth and away from noise.
- Find the frame line before each take and watch for boom shadows.
- Record boom and lav together where possible for the best options in editing.
Frequently asked questions
Where should a boom microphone be placed?
Should I use a shotgun microphone indoors?
What is a shock mount?
What is a dead cat on a microphone?
Conclusion
Boom microphones give natural, film-like dialogue when they are close, well aimed, protected from handling and wind, and kept just outside the frame. Next, you will learn the recording settings that keep that sound clean: levels, gain and sample rate.
Finished reading? Track your progress through Sound for video.